Quantcast
Channel: Welcome to the StarNet Knowledge Base
Viewing all 276 articles
Browse latest View live

FastX 3 – Active Session Manager

$
0
0

After Login, FastX will go to the user’s FastX homepage. By default, the homepage is the user’s active session webpage (/session/).

Homepage

  • List Display
  • Browser List

    • Check Box – Check box all or individual to deleted or edited.
    • Name – Name of session.
    • Connected – Last time connected to session.
    • Uptime – Amount of time the session as been running.
    • Login – User who started the session.
    • *Each category can be sorted by clicking on the desired category.

  • Grid Display
  • Browser Grid

    • Active Session Option – Single click session or check box in list view to activate session options.Licenses
      • Licenses
        • Get Info – Displays detail information on the active session
        • Session Info

        • Set Custom Parameters – Custom parameters set for active session.
        • **To add parameter hit the add button.Add Button W 
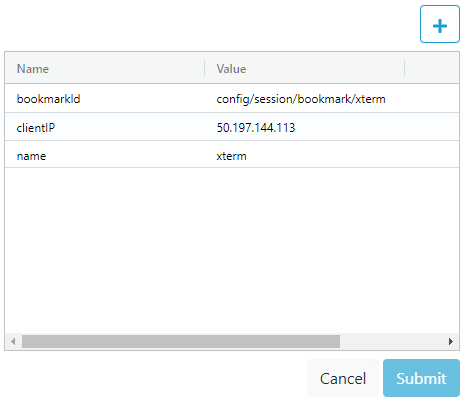
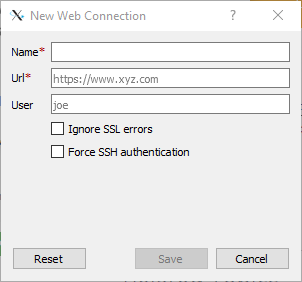
Fill Name and Value, then hit Submit.
          **To delete parameter, highlight parameter, then hit the “x” buttonDelete Button, then hit Submit.

          • Name – Name of parameter.
          • Value – Parameter used.
            Session Parameter
          • View Logs
          • Session Log Option

            • server – Server logs of the active session.
            • xorg – X.org logs for the active session.
            • Session Server Log

          • Disconnect All Clients – Disconnects all clients connected to session.
          • Terminate – Terminates highlighted or check boxed session.

FastX 3 Browser Client User Guide

FastX 3 – Starting a New Session

$
0
0

Start a Session – Click on plus button from the session active webpage.Add Button Double click on existing bookmark or single click on bookmark and click the Launch button to start session.

  • Bookmarks
  • Browser List

      Browser Options
    • Favorites List favorite bookmarks. To select bookmark as favorite, single click existing bookmark and select heart.
    • Favorite heart

    • User – List of existing bookmarks the users created.
    • System – List of bookmarks created for universal use by all users.
    • All Bookmarks – Lists User and System bookmarks
  • Command
  • Browser List

  • Command – Command to run application or desktop.
  • Window Mode
    • Single – Single window mode launches a root window defined by the height and width
    • Multiple – Multiple window mode launches individual application in its own separate window
  • Name – Name of session
  • Launch – Click to launch session
    • Browser List
    • Create Bookmark – Creates bookmark with filled fields.
    • Clear History – Clears history of launched sessions.

FastX 3 – Desktop Client – Making a Connection

$
0
0

Click on the plus button to make a new connection. Desktop Add Connection

    Desktop Connection Option
  • SSH – Makes an SSH connection to remote host.
    • Desktop SSH
    • Name – Name of connection.
    • Host – URL or IP of host.
    • Port – Port used for SSH. (Default Port 22)
    • User – Username to log into remote host.
    • Path – Path of protocol. (Do not change unless user is an advanced user)
    • Forward Agent Connections – Check box enable Forward Agent.
  • Web – Make a web connection to host.
    • Desktop Web
    • Name – Name of connection.
    • Url – URL of host, must include colon and port after URL. (e.g. https://example.com:3300)
    • User – Username to log into remote host.
    • Ignore SSL errors – Check box to ignore SSL errors.
    • Force SSH authentication – Check box forces use of SSH authentication.

FastX 3 – Desktop Client – Session Manager

$
0
0

After making a connection, the FastX session manager window will be prompted.
Session Manager Options – Click on option button.Option

    Session View
  • Show Grid – Shows list of active session with screen shot.
  • Desktop Session
    Grid Session Options – Single click active session to display options.

    • Info – Click on info icon.Desktop Session Information displayed Connections, Uptime, and Login.
      • Connections – Time connected to active session.
      • Uptime – Total uptime of active session.
      • Login – User who created active session.
  • Show List – List view of active sessions.
  • Session View

    • Name – Name of active session.
    • Connections – Time connected to active session.
    • Uptime – Total uptime of active session.
    • Login – User who created active session.
    • *List can be sorted by clicking on Name, Connections, Uptime, or Login.

    • Edit Name – Edit session name by single clicking the session and then click the edit button. Edit Button
    • Disconnect – To disconnect from a session, single clicking the session and then click the session edit button Edit Button and select Disconnect.
    • Terminate – To terminate an active session, single clicking the session and then click the terminate button. Edit Button

FastX 3 – Desktop Client – Start a Session

$
0
0

After connection to a remote host, the FastX Session Manager window will appear.
Session Manager

Start a New Session – Click on the add button Add Session to start a new session.

    The FastX Bookmark Manager window will appear.
    Desktop Bookmarks
      Select an existing Bookmark from Global Bookmarks or My Bookmarks, or enter in the command and window mode manually.
      *Double clicking on a bookmark will launch the session.
    • Command – Command used to launch application or desktop. (Full path of command may be needed)
    • Window Mode
      • Single – Single Window mode launches a root window defined by the height and width.
      • Multiple – Each individual application will run in its own separate window.

FastX 3 – Desktop Client – New Bookmark

$
0
0

Click on the new bookmark icon. Bookmark Icon
*New bookmarks will appear under My Bookmarks in the Bookmark Manager window.
New Bookmark

Click the “New” button to create bookmark. Then double click Name, Command, and Window Size to edit.

  • Name – Name of bookmark.
  • Command – Command used for bookmark
  • Window Size – Enter height and width of window (e.g. 1024×768) or type “Multiple” for multiple window mode.
  • Bookmark Icon – Click on this button to delete bookmark.

Tabs

  • Bookmarks – List existing bookmarks.
  • Suggestions – List Global Bookmarks. Double click on listed session to add.
  • History – History of sessions that were launched. Double click on listed session to add.

FastX 3 – Desktop Client

$
0
0

FastX 3 Desktop Client launches with a connection manager window. You can add and edit existing connections from this window. First time users will have a blank window.
Desktop Client
FastX 3 Info – Click on the info button. Desktop Info

    Desktop Info
  • About – Prompts FastX 3 window with version information.
  • Documentation – Sends you to a webpage with help information

Getting Started


FastX 3 Desktop Client Release Notes

$
0
0

FastX 3 Desktop Client Released
June 19, 2020

  • Windows version
  • Mac version

FastX 3

$
0
0

MATE Desktop background missing

$
0
0

When running mate-session, you may see that your background is missing and appears all black.

This is typically due to the fact that Mate’s file manager caja is not installed

Solution

Install caja on your system
yum install -y caja

Running FastX through an nginx proxy

$
0
0

setsebool -P httpd_can_network_connect 1


proxy_buffering: off

FastX 3 Directories

$
0
0

Installation Directory

    By default, most of FastX is installed in /usr/lib/fastx/3, with the ssh interface program installed in /usr/bin/fastx-protocol. Configuration, database, licenses, and local files are located in /usr/lib/fastx/var. The first component of those directories “/usr” can be set, when installing, to any location. For example, if you set the installation directory to /opt/sw/fx, then most of the files will be  located under /opt/sw/fx/lib/fastx/3, the var directory will by default be /opt/sw/fx/lib/fastx/var, and the SSH interface script will be /opt/sw/fx/bin/fastx-protocol.

FastX var Directory

    • The var directory contains files that are specific to this installation of FastX. This includes configuration files (see FastX config Directory below), the local directory (see below), web (SSL) certificates, license files, and local web files (if used).

While not recommended, the FastX web server can be configured to use a different var directory by setting the environment variable FX_VAR_DIR. See “Setting Environment Variables” below.

FastX config Directory

    • The config directory contains configuration files that can be common across all FastX cluster members. By default the config directory is named “config” under the var directory. FastX can be configured to use a different config directory by setting the environment variable FX_CONFIG_DIR. One possible reason for doing this is to allow 2 instances of the FastX web server to run on one system, on different ports, with different configurations, although this is not recommended because it would double the memory use.

The config directory is read by the fastx-protocol and session start scripts, as well as the FastX web server.

FastX local Directory

    The local directory contains the FastX database, the server ID, and the public-private key for this FastX server. This directory must be unique (not shared) for each FastX server (including FastX cluster members). By default the local directory is named “local” under the var directory. The FastX web server can be configured to use a different local directory by setting the environment variable FX_LOCAL_DIR.

FastX Authorized Keys Directory

In a clustered environment, all servers require a public key to sign and verify messages coming from other servers.  These keys are stored in the database by default.  This poses a security threat if a server in the cluster is compromised as it could modify and fake another server’s public key.  For maximum security, the public keys can be stored outside of the database in a directory.  Set the environment variable FX_AUTHORIZED_KEYS_DIR to enable offline storage of public keys.

FastX user Directory

    The FastX user directory can hold the user’s bookmarks and history when the FastX web server is not running. (When the FastX web server is running, these items are stored in the FastX database.) By default, this directory is $HOME/.fastx_server. It can be changed by setting the FastXPath variable in the FastX.conf file.

FastX session Directory

    • The FastX session directory holds a sub-directory for every FastX running session. Each session sub-directory contains session log files, the X11 authority file, session parameters, and miscellaneous settings including process IDs, display numbers, etc. The path to the session sub-directory is set in the FASTX_SESSION_DIR environment variable in the running session.

By default, the FastX session directory is $HOME/.fastx_server/`hostname`/sessions/. It can be changed by setting the SessionPath variable in the FastX.conf file.

Setting Environment Variables

    • Service Files
        In the default FastX installation, service startup files to start the FastX web server (and the license manager) are automatically installed when the “install.sh” script is run. The FX_* environment variables are modified in the file /etc/sysconfig/fastx3. Variables are set using the syntax “NAME=value”.
    • Hostname Substitution
        In some cases, such as when several FastX servers (including cluster members) mount the same FastX var directory, it is necessary to specify a unique directory name by including the system host name. This can be done in the /etc/sysconfig/fastx3 file with a substitution that depends on the type of system.

If the system uses systemd, which is default for modern Linux systems including Red Hat 7 or later, use “%H” to substitute the host name. For earlier systems, using the older init.d startup file,  use “$HOST”. To determine if your system is using systemd, run the command systemctl. If it shows many units loaded, then your system is a systemd system. If the systemctl command is not found, or shows nothing, then your system is the older init.d type.

      • Example
          Suppose FastX is installed, as above, in /opt/sw/fx, and you wish to configure your local directory as /opt/sw/fx/var/local/`hostname`/. Further, suppose your system is a RedHat 7 system running systemd. Therefore, assuming the startup files have all been created, the file /etc/sysconfig/fastx3 would be created with this line:
FX_LOCAL_DIR=/opt/sw/fx/var/local/%H
    • Non-root Installation
        If the FastX web server is not being started from a system startup file, then the “run-web” script is probably being used. In this case the environment variables will be set manually. For example, suppose FastX is installed in your home directory at $HOME/FastX and you wish to set the local directory to $HOME/.fastx-server/var/local. In this case, you would start FastX with the following command:
FX_LOCAL_DIR=$HOME/.fastx_server/var/local $HOME/FastX/lib/fastx/3/tools/run-web
    • Per-User Directories
        In some cases you may wish to put the users’ session directories in a location not in their home directory. For example, suppose the session directory should be in /var/fastx/user/$USER/$HOST/sessions. To do this, the FastX.conf file (in the config directory) will have this line:
SessionPath=/var/fastx/user/$USER/$HOST/sessions

FastX Licensing Debugging

$
0
0

When experiencing FastX licensing issues, please do the following checks to verify that FastX is properly licensed.

Prerequisite

  • FastX installed
  • A registered license file and is placed in the proper location

Licensing Set-Up

Additional Information
————————————————————-

Single System Licensing

  • Verify License Location and Permissions
    • License file must end in .lic
    • License file must be readable by all
chmod a+r license.lic
  • FastX License Location
  • FastX 2 User: ls -al /usr/lib/fastx2/var/licence
    FastX 3 User: ls -al /usr/lib/fastx/var/license
  • Verify the license has the correct HostID – The HostID in the license file must match the FastX host machine
  • To check the HostID of the host, run the following command:

    FastX 2 User: /usr/lib/fastx2/rlm/rlmutil rlmhostid
    FastX 3 User: /usr/lib/fastx/3/rlm/rlmutil rlmhostid
  • Verify rlm service is running
  • ps -ef | grep rlm
  • Check license availability
    • Check must be done as nonroot
    • Go to the following directory
    FastX 2 User: cd /usr/lib/fastx2/var/license
    FastX 3 User: cd /usr/lib/fastx2/var/license
  • Run following command to check license availability
  • FastX 2 User: /usr/lib/fastx2/rlm/rlmutil rlmstatus -avail
    FastX 3 User: /usr/lib/fastx/3/rlm/rlmutil rlmstatus -avail

    Centralized System Licensing

  • FastX Session Server(s)
    • License File Check
      • FastX License Location
    FastX 2 User: ls -al /usr/lib/fastx2/var/licence
    FastX 3 User: ls -al /usr/lib/fastx/var/license
  • License file should point to the hostname or IP of the license server
  • License file example (the zeros are required):

    HOST license_server.example.com 00000000
  • License file and directory must be readable by all
  • Check license availability
    • Check must be done as nonroot
    • Go to the following directory
    FastX 2 User: cd /usr/lib/fastx2/var/license
    FastX 3 User: cd /usr/lib/fastx2/var/license
  • Run following command to check license availability
  • FastX 2 User: /usr/lib/fastx2/rlm/rlmutil rlmstatus -avail
    FastX 3 User: /usr/lib/fastx/3/rlm/rlmutil rlmstatus -avail

  • RLM service should not be running
  • ————————————————————-

    Additional Information

    • Issues with FastX that is acting as the centralized license server, please review the Single System Licensing check
    • RLM License Server is installed as a standalone centralized license server
      • License file is stored in the RLM directory
      • RLM installs with an interactive admin page, please go to URL
    http://localhost:5054
    • There are two logins: admin and user with no passwords. We recommend changing the password after logging in. After logging in, admin can check the status of the license server

    FastX Startup Options

    $
    0
    0

    In a default instaIn the default FastX installation, service startup files to start the FastX web server (and the license manager) are automatically installed when the “install.sh” script is run.

    There are multiple options available to change the configuration (mostly directory locations).

    Root Installation

    When running as root, FastX 3 is installed as a service.
    Create and edit /etc/sysconfig/fastx3 to make modifications

    Nonroot Installation

    Start the FastX web server by running /usr/lib/fastx/3/tools/run-web

    It will use the environment variables to set the proper configurations.

    Files

    Startup files are located in the config directory.  See FastX Configuration Directory for more details

    Environment Variables

    NODE_OPTS

    Options to pass to the NodeJS web server.
    This variable is ignored if you are running nonroot. For nonroot, pass the node options as command line parameters to  the run-web application

    FX_VAR_DIR

    Default: /usr/lib/fastx/var

    Sets the var directory.

    Directory for Configuration, database, licenses, and local files.  The var directory contains files that are specific to this installation of FastX. This includes configuration files (see FastX config Directory below), the local directory (see below), web (SSL) certificates, license files, and local web files (if used).  It is recommended that you leave this default

    FX_CONFIG_DIR

    Default: /usr/lib/fastx/var/config

    Sets the config directory

    The config directory contains configuration files that can be common across all FastX cluster members.
    The config directory is read by the fastx-protocol and session start scripts, as well as the FastX web server.

    FX_LOCAL_DIR

    Default: /usr/lib/fastx/var/local

    Sets the local directory

    The local directory contains the FastX database, the server ID, and the public-private key for this FastX server. This directory must be unique (not shared) for each FastX server (including FastX cluster members)

    FX_AUTHORIZED_KEYS_DIR

    Default: NA

    Sets the Authorized keys directory for clustering. This enables offline storage of public keys. When not set, FastX assumes the database is secure.

    In a clustered environment, all servers require a public key to sign and verify messages coming from other servers.  These keys are stored in the database by default.  This poses a security threat if a server in the cluster is compromised as it could modify and fake another server’s public key.  For maximum security, the public keys can be stored outside of the database in a directory.

    Hostname Substitution

    In some cases, such as when several FastX servers (including cluster members) mount the same FastX var directory, it is necessary to specify a unique directory name by including the system host name.

    systemd systems

    %H  — substitute for the the hostname

    Older init.d systems

    $HOST — substitute for the the hostname

    Determining if you are using systemd

    FastX is built to run on both systemd and non systemd operating systems.

    To tell if you are running systemd, run the command systemctl

    If it prints lots of services, you are running systemd
    If it is not found, you are running the older init.d style systems

    Examples

    FastX installed in a non-default directory

    Suppose FastX is installed in /opt/sw/fx, and you wish to configure your local directory as /opt/sw/fx/var/local/`hostname`/. Further, suppose your system is a RedHat 7 system running systemd. Therefore, assuming the startup files have all been created, the file /etc/sysconfig/fastx3 would be created with this line:

    FX_LOCAL_DIR=/opt/sw/fx/var/local/%H

    Nonroot Installation

    If the FastX web server is not being started from a system startup file, then the “run-web” script is probably being used. In this case the environment variables will be set manually. For example, suppose FastX is installed in your home directory at $HOME/FastX and you wish to set the local directory to $HOME/.fastx-server/var/local. In this case, you would start FastX with the following command:

    FX_LOCAL_DIR=$HOME/.fastx_server/var/local $HOME/FastX/lib/fastx/3/tools/run-web


    Running the NodeJS Debugger

    NodeJS comes with a built in debugger.  To run it

    Root installation

    Edit /ect/sysconfig/fastx3

    NODE_OPTS=--inspect --inspect-port=0
    Nonroot installation
    /usr/lib/fastx/3/tools/run-web --inspect --inspect-port=0

    Per-User Directories

    In some cases you may wish to put the users’ session directories in a location not in their home directory. For example, suppose the session directory should be in /var/fastx/user/$USER/$HOST/sessions. To do this, the FastX.conf file (in the config directory) will have this line:

    SessionPath=/var/fastx/user/$USER/$HOST/sessions


    FastX Configuration Directory

    $
    0
    0

    FastX stores shared configuration in the database.  This allows configuration changes to be automatically propagated to other systems in a cluster.

    Configuration that is private to the local system is stored in the config directory (default /usr/lib/fastx/var/config, set by FX_CONFIG_DIR)

    www.json

    This file holds the information needed to start the web server including port, certificate paths, and other options.  See WWW for more information

    This file must be world readable as sessions use this file to attempt to reconnect with the web server

    override.json

    This file updates the database on startup and then renames itself.  This is typically done to update database configuration during installs.  This file does a hard update.  There is no checking if the data is valid.  Once the web server starts up, the override.json file is renamed, so it does not write it again.

    Create an override.json file by logging in to the web server as an admin > System > Tools > Export.

    suggestions.json

    When the web server IS NOT running, this file is used to store the bookmarks.

    When the web server IS running, this file will put any new bookmarks into the database.  If the bookmark already exists, it will be skipped.

    admin.json

    This file is created by the install.sh script and sets the initial admins for the database.  If there is already an admin record in the database this file does nothing.  Use the override.json file or the admin-reset tool to reset your admins.

    session.json

    When the web server IS NOT running, this is the profile of the session.

    When the web server IS  running, this file is ignored.

    FastX.conf

    Sets special variables for launching sessions.  These are the default paths where the session will store session information

    UserPath=$HOME/.fastx_server/$HOST
    FastXPath=$UserPath/..
    SessionPath=$UserPath/sessions

    FastX CLI

    $
    0
    0

    The FastX server comes with a command line client that allows users to execute api calls to the web server.

    Basic Usage

    The Command Line client will automatically log the user in locally and generate a FastX  Authorization Token.  This simplifies the setup

    Command Line Parameter Format

    /usr/lib/fastx/3/tools/fastx-cli [api_method] --arg1=arg1 --arg2=arg2 ...

    JSON Format

    /usr/lib/fastx/3/tools/fastx-cli [api_method] --json='{ JSON_OBJECT }'

    Advanced Usage

    Generating a token

    /usr/lib/fastx/3/tools/fastx-cli token create

    This will generate a token to be used at a later time.  The basic version automatically does this for you when executing the api call

    Shutting down the link daemon

    /usr/lib/fastx/3/tools/fastx-cli shutdown

    FastX runs a daemon called link in order to start new sessions.  Shutting this down will force a user to re-authenticate when launching a new session. Other API calls such as listing sessions and performing actions on  running sessions are not affected by this command.

    FastX Custom Start Forms

    $
    0
    0

    Administrators can create custom forms in FastX that will appear in the start session dialog box.  These forms allow admins to create user friendly options that will be added to the start data when sending the start command.

    Selecting the Start Server

    In a cluster setup, an admin may want to allow the user to select on which server he wants to start a new session.

    • Log in as an admin
    • System > Clustering > Cluster Setup > Allow user to select server on session start
    • Save

    When launching a session, this will pop up a list of servers to connect to (if there is more than one server in a cluster).

    Note that this option only sets the serverId of the start data.  An admin will still need to set up a load balancing script that will use this option

    Creating a Custom Params Form

    System administrations may have custom parameters that they want their users to set when launching sessions.  For example, if job scheduling, a system admin may want to know if a user needs a server with a video card.  The custom params form allows the system admin to use basic html to create a form that will be injected into the start script.

    • Log in as an admin
    • System > Sessions > Forms > Create a new form
    • Save

    The form allows for a subset of HTML to be used.  Javascript is disabled to prevent XSS attacks.  The admin can simply add in the form inputs he wants and it will appear.
    FastX uses Bootstrap 4 styling which can be added o keep the look and feel consistent through the form.  Valid input will be added to the params object of the start data.

    Example

    <div class="form-group">
       <label>My Custom Input</label>
       <input type="text" class="form-control" name="myCustomInput" />
    </div>
    <div class="form-group">
       <select name="minRam" class="form-control">
           <option value="1">1 GB</option>
           <option value="2">2 GB</option>
           <option value="10">10 GB</option>
       </select>
    </div>


    Setting myCustomInput to “hello” and selecting minRam to 1 GB will set the params object to

    {
       "myCustomInput":"hello",
       "minRam": "1"
    }


    Note that both values are strings

    data-type option

    You can set a custom data-type attribute on a form input that will convert the string into a more useful type.

    The data-type options include

    • “number” — parse the value as a Floating Point number
    • “boolean” — parse the value as a boolean
    • “json” — parse the value as a JSON object

    Adding data-type to our original example

    <div class="form-group">
     <label>My Custom Input</label>
     <input type="text" class="form-control" name="myCustomInput" />
    </div>
    <div class="form-group">
     <select name="minRam" data-type="number" class="form-control">
        <option value="1">1 GB</option>
        <option value="2">2 GB</option>
        <option value="10">10 GB</option>
     </select>
    </div>

    Will result in

    {
     "myCustomInput":"hello",
     "minRam": 1
    }

    Reserved names

    FastX automatically overwrites the following parameter names.  You should avoid using these

    • “name” — sets the display name
    • “icon” — sets the default icon
    • “bookmarkId” — sets the bookmark id when connecting with a bookmark. This id is used in making shortcuts
    • “clientVersion” — overwritten with the client version on connect
    • “clientId” — The desktop client that connected
    • “clientIP” — IP address the client connected from (when using the desktop client)
    • “clientTransport” — The method used to connect (“SSH”, “Web” etc)

    FastX 3 Non-Root Installation

    $
    0
    0

    Note: Many system administrators have root access, but wish to install the FastX server in an alternate location (for example a shared directory). The rpm package can be relocated by following these instructions

    Server Side Installation

    Installing the RPM

    Users who do not have root access can still install FastX using the following commands to extract the file from rpm. First, download the RPM file to your home directory, then run these commands to extract it:

    cd $HOME
    mkdir FastX
    cd FastX
    rpm2cpio ~/FastX3-version.build.rhel7.x86_64.rpm | cpio -id
    mv usr/* .
    rmdir usr
    

    The next step is to license FastX

    Licensing

    Activating a License

    To install a license (necessary to launch a session), run:

    $HOME/FastX/lib/fastx/3/install/activate

    Running the License Server

    After the license is installed, run the license server

    $HOME/FastX/lib/fastx/3/rlm/rlm -c $HOME/FastX/lib/fastx/var/license

    Suggestions

    FastX can scan your system and preconfigure basic suggestions (GNOME, KDE, xterm etc) to simplify the connection process.  If you want FastX to check for default suggestions ru

    $HOME/FastX/lib/fastx/3/install/suggestions

    Web Server

    NodeJS must be installed as a prerequisite to running a web instance of FastX.  If node is already installed in the /PATH/to/node, please go to the following step.

    Running the Web Server

    To run the web service with default settings, run:

    nohup node $HOME/FastX/lib/fastx/3/www/server/bin/fastx_server.js &

    Client Side Connections

    Connecting Via the Web

    The web server must be installed and running before connecting

    1. Open a Browser
    2. Connect to http://your.server.name.com:3300


    Connecting Via the Desktop Client using SSH

    1. Launch the FastX Desktop Client
    2. Click on the plus “+” icon
    3. Select the SSH option
    4. Fill out the Name, Host and User information
    5. Set the Path field to the path to the fastx-protocol $HOME/FastX/bin/fastx-protocol
    6. Save
    7. Connect

    What we want in FastX 3?

    Viewing all 276 articles
    Browse latest View live